Image-to-STL — Free Online Converter
Convert Image to STL Online —
Free 3D Model Generator
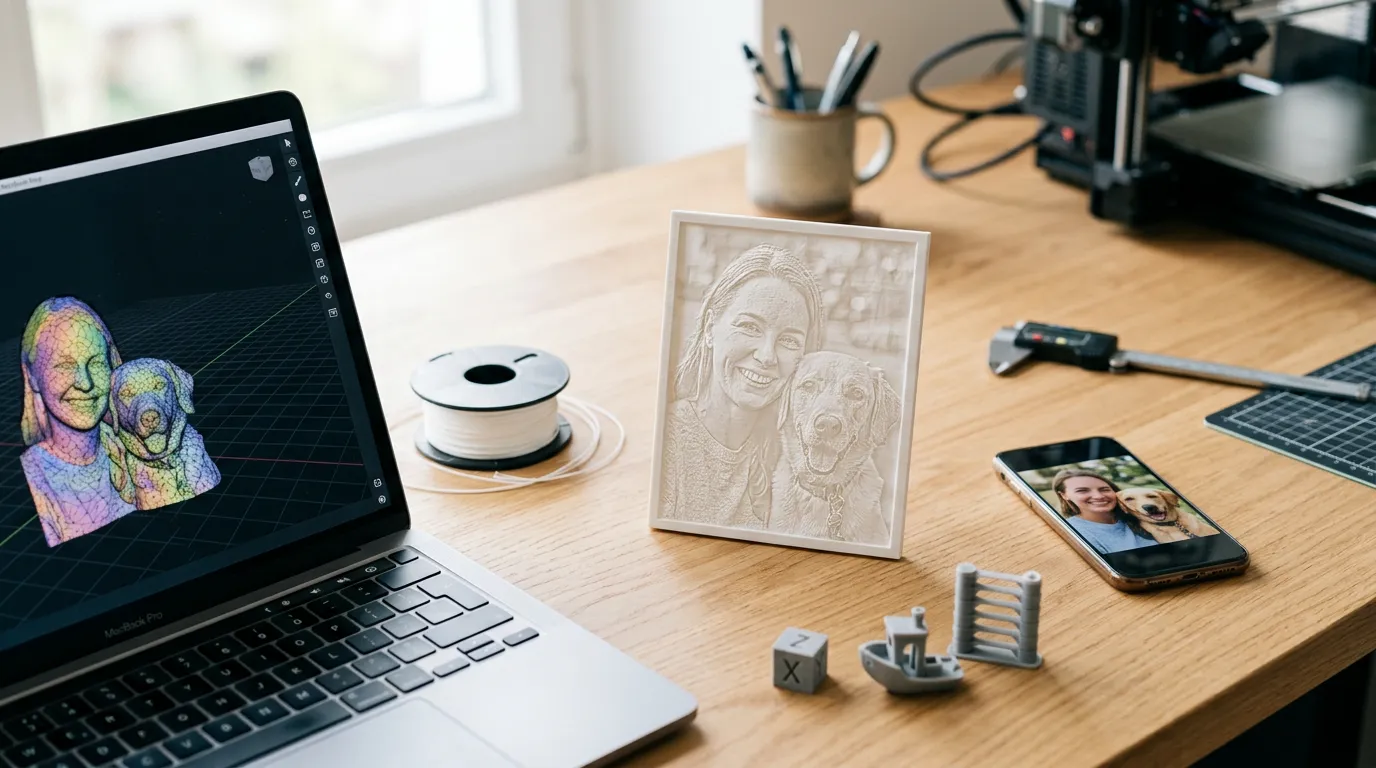
Transform your JPG, PNG, and SVG images into 3D-printable STL files — entirely in your browser. No uploads, no software downloads, no fees. Get instant real-time 3D preview powered by Three.js and download your model as STL, OBJ, or GLB in seconds.
By the Image to STL Converter Team — published , updated
01 — The converter
Turn any image into a print-ready 3D model
Drop your image here
JPG, PNG, SVG, BMP, WebP
Parameters
Export Format
STL — Universal 3D printing format. Works with all slicers.
Upload an image to preview
02 — At a glance
Built for speed, privacy & scale
03 — How it works
Four steps to a finished model
Upload Your Image
Drag and drop a JPG, PNG, or SVG file — or try one of our built-in samples. All major image formats are supported. Your file stays on your device.
Choose Mode & Adjust
Select Heightmap for photo reliefs, SVG Extrude for logos, or Lithophane for backlit panels. Fine-tune height, smoothness, base thickness, and resolution with live sliders.
Preview in Real-Time 3D
Rotate, zoom, and inspect your model interactively with Three.js. Toggle between solid and wireframe views. Every parameter change updates the preview instantly.
Download & Print
Export as STL for direct slicing in Cura, PrusaSlicer, or Bambu Studio. Also available in OBJ (with color) and GLB (for web/AR). Start printing immediately.
04 — Why this tool
Why This Image to STL Converter
Every feature is designed around one principle: your data stays on your device, and the result is print-ready in seconds.
Private by Design
Every conversion runs in your browser using JavaScript and Canvas APIs. No file ever leaves your device. No server-side processing. No data collection.
Real-Time 3D Preview
Powered by Three.js with WebGL hardware acceleration. Rotate, pan, and zoom your model before downloading. Switch between solid and wireframe views to inspect mesh quality.
Three Conversion Modes
Heightmap converts pixel brightness to physical height — ideal for portraits and reliefs. SVG Extrusion extracts vector paths into crisp 3D solids. Lithophane mode creates translucent backlit panels.
Three Export Formats
Download as binary STL — the universal 3D printing format. Or choose OBJ for color support in Blender. GLB (glTF binary) for modern web, AR, and VR applications.
No Limits, No Waiting
Everything runs locally — no queue, no cooldown, no daily cap. Convert as many images as you want. File size limited only by your device memory. No account needed.
SVG & Vector Support
A unique feature competitors do not offer. Upload SVG logos, icons, and vector art — our parser extracts real bezier paths and extrudes them into solid, watertight 3D meshes. Perfect for signage and badges.
05 — Formats
Supported File Formats
Upload images in any common format and export your 3D model in the format that fits your workflow.
Input — Image Formats
Output — 3D Formats
06 — Creations
What You Can Create
From wall art to custom tools, here is what makers create with this image to STL converter.
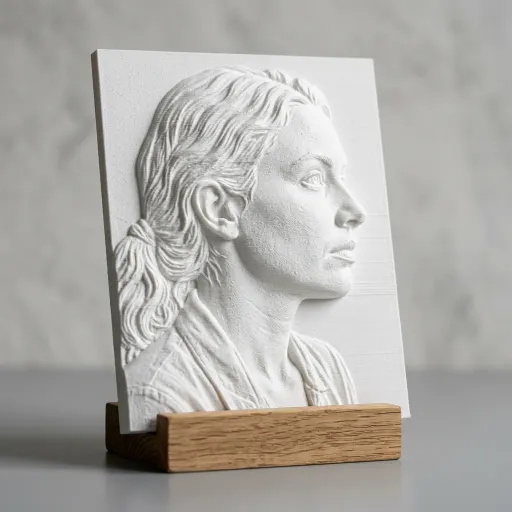
3D Photo Reliefs
Turn any portrait, landscape, or artwork into an embossed 3D panel. The heightmap mode maps pixel brightness to physical depth, creating detailed reliefs perfect for wall art, coasters, and decorative tiles.
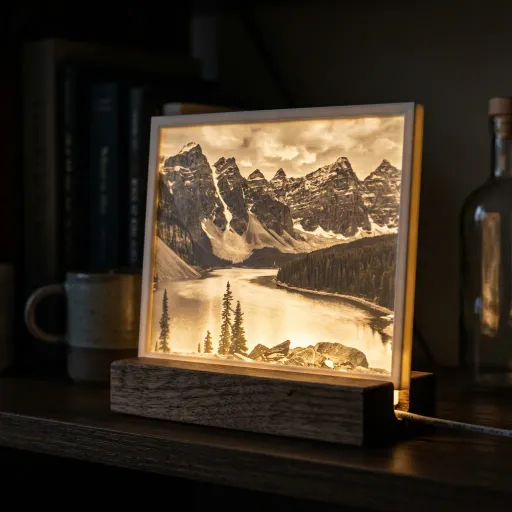
Lithophanes
Convert your photos into thin translucent panels. When backlit, the varying thickness reveals your image in stunning detail. Makes incredible personalized lamps, night lights, and window displays.
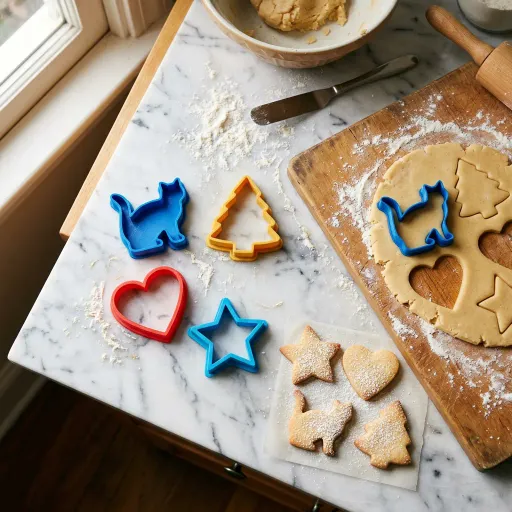
Cookie Cutters
Upload a silhouette or simple shape and get a custom cookie cutter STL. Perfect for themed parties, holidays, and personalized gifts.
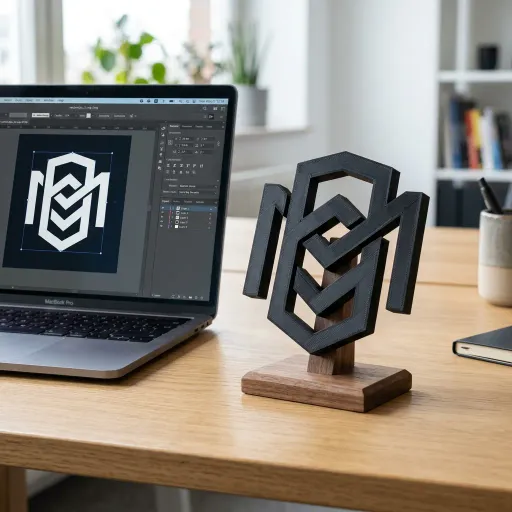
Logo & Icon Extrusions
Upload your SVG logo and extrude it into a solid 3D object. Ideal for custom signage, desk ornaments, keychains, and brand merchandise.
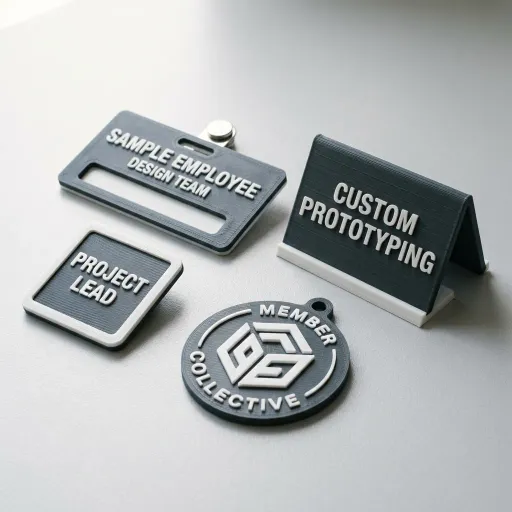
Custom Badges & Signs
Create raised lettering, embossed text, and dimensional signage. Use the text-to-3D tool for quick typography or upload complex SVG designs.
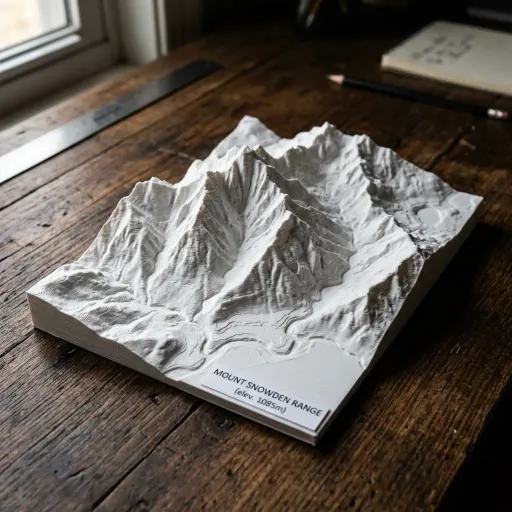
Topographic & Terrain Maps
Convert grayscale height maps, elevation data, or satellite imagery into 3D terrain models. Adjust the height scale for dramatic mountain ranges or subtle landscape contours.

Custom Jewelry & Pendants
Create personalized pendants, charms, and medallions from photos and designs. Convert a meaningful symbol, initials, or a small photo into wearable 3D printed jewelry. Use resin printing for finer detail on small pieces.

Stamps & Embossing Tools
Design custom stamps for clay, fondant, soap, leather, and paper crafts. Use the invert toggle to create the negative impression, then print with flexible filament or hard PLA depending on your material.

Molds for Casting & Chocolates
Create food-safe molds for chocolates, candies, ice cubes, and resin casting. Convert your design to a negative relief, print the mold, and cast your creations. Use food-safe filament if making edible items.
07 — Comparison
How We Compare
Not all image-to-STL converters work the same way. Here is how our browser-based approach compares.
| Feature | This Tool | Server-Based | Desktop Software |
|---|---|---|---|
| Privacy | 100% local — no uploads | Files sent to servers | Files stay local |
| Speed | Instant preview | Queue (1-5 min) | Hardware dependent |
| 3D Preview | Real-time rotate | Rarely available | Native support |
| Cost | Free forever | Limited free tier | Free options exist |
| File Limits | No limits | Daily caps | No limits |
| Registration | Not required | Often required | Not required |
| SVG Support | Native extrusion | Raster only | Plugins needed |
| Modes | 3 modes | Usually 1 mode | Complex setup |
| Setup | Zero — open browser | Open browser | Install + learn |
08 — More tools
More Free 3D Tools
JPG to STL
Convert JPG photos to 3D printable models with heightmap mode.
PNG to STL
PNG images with transparency for clean reliefs and extrusions.
SVG to STL
Extrude vector paths into watertight 3D solids for printing.
Photo to 3D
Turn any photo into a 3D model with advanced depth mapping.
Text to STL
Type any text and extrude it into a 3D printable model instantly.
Cookie Cutter Maker
Turn silhouettes into custom cookie cutter STL files in seconds.
Lithophane Maker
Create stunning backlit 3D prints from your photos.
Heightmap Editor
Fine-tune contrast, brightness, and threshold for precise reliefs.
Sources
Sources & References
Facts and background on this page are drawn from the following external references. We cite primary and institutional sources, and quote them verbatim with attribution, so you can verify every claim independently.
On the STL format
“Since its introduction in the late 1980s, STL has become a de facto standard for rapid prototyping and 3D printing.”
— Library of Congress, STL (STereoLithography) File Format, Binary, Sustainability of Digital Formats. The same entry notes that “the STL file format was openly documented by its originator, Charles Hull of 3D Systems, Inc.” loc.gov
On the additive manufacturing market
“The global AM industry grew by 9.1% overall to USD 21.9 billion, with most of this growth being attributable to the development of the AM industry in Asia and China in particular.”
— Wohlers Associates, powered by ASTM International, Wohlers Report 2025, published 31 March 2025. wohlersassociates.com
On lithophanes
“Lithophane, biscuit, or unglazed, white porcelain decorated with a molded or impressed design, usually reproducing a painting, that was meant to be seen by transmitted light.”
— Encyclopædia Britannica, Lithophane. Britannica dates production to “about 1830 to about 1900, mostly in Germany, by the Royal Factory at Berlin and by Meissen.” The 3D-printed lithophane is the direct descendant of this porcelain craft. britannica.com
On the file-format successor
ISO/ASTM 52915:2020, Specification for additive manufacturing file format (AMF) — the standards-track successor format that addresses STL’s lack of colour, material, and unit metadata. iso.org
09 — Pro tips
Tips for the Best STL Conversion
Use High-Contrast Images
Images with clear light/dark separation produce the best reliefs. Avoid flat, low-contrast photos — they result in shallow, indistinct 3D surfaces.
Choose the Right Mode
Use Heightmap for photographs and realistic reliefs. Use SVG Extrusion for logos, icons, and vector art. Use Lithophane only when you plan to backlight the print.
Adjust Smoothness Carefully
Too much smoothing loses detail; too little creates a noisy mesh. Preview the wireframe to check mesh quality before downloading.
Scale for Your Printer
Set base dimensions to match your printer bed size. Larger models show more detail but take longer to slice and print.
Check Mesh in Wireframe View
Toggle wireframe mode in the 3D preview to inspect triangle density and detect any artifacts before exporting.
Export the Right Format
Use STL for direct 3D printing. Use OBJ for editing in Blender. Use GLB for sharing online or embedding in web-based viewers.
Use Grayscale Images for Precise Control
For maximum control over the height map, convert your image to grayscale first. Each shade of gray maps to a specific height, giving you predictable results. Dark gray = low areas, light gray = high areas.
Remove Backgrounds Before Uploading
A clean subject isolated from the background produces the best 3D relief. Remove backgrounds in any image editor, or use a PNG with transparency. The transparent areas automatically map to zero height.
Test with Sample Images First
The tool includes built-in sample images. Use them to understand how each parameter affects the output before uploading your own photos. This saves time and helps you dial in the right settings.
Use the Invert Toggle for Different Effects
The invert button swaps embossed (raised) and engraved (recessed) modes. Try both on every image. Portraits often look better engraved; text and logos usually work better embossed. Preview both before downloading.
Add a Base Plate for Stability
Enable the base plate option to add a flat bottom surface. This makes relief models stand upright for display, improves bed adhesion during printing, and gives the print a professional finished look.
Resize in Your Slicer, Not the Tool
The tool generates a model at a default scale. Resize it in your slicer (Cura, PrusaSlicer) to fit your printer bed and desired output size. This gives you millimeter-precise control over the final print dimensions.
10 — Specifications
Technical Specifications
Understand the technical capabilities and limitations of the browser-based image to STL converter.
Processing Resolution
Images are processed at 512px on the longest side for performance. This generates STL meshes with up to 250K+ triangles, which provides excellent detail for FDM and resin 3D printing. The limiting factor is typically your slicer's mesh handling, not the conversion quality.
STL Output Quality
All modes produce watertight, manifold binary STL files. No mesh repair is needed before slicing. The output is compatible with Cura, PrusaSlicer, Bambu Studio, OrcaSlicer, Simplify3D, and all standard slicers.
Browser Requirements
Works on Chrome, Firefox, Edge, and Safari (desktop and mobile). Requires WebGL support for the 3D preview. The converter itself uses Canvas API and works on any modern browser. No extensions or plugins needed.
Performance
Conversion is near-instant on modern hardware. The heightmap algorithm processes in milliseconds. SVG path parsing and triangulation may take 1-2 seconds for complex designs. Mesh generation and STL export complete within 1-2 seconds for typical resolutions.
Privacy & Data Handling
Zero data leaves your device. No cookies track your usage. No analytics scripts monitor your conversions. No CDN, no third-party services, no server logs. The entire tool is a static web page served once and runs entirely client-side.
Supported 3D Printers
Compatible with all FDM printers (Creality, Prusa, Bambu Lab, Anycubic, Elegoo) and resin/SLA printers. The STL format is universal. Print size is determined by your printer bed — scale in your slicer to fit any build volume.
11 — Who it's for
Who Should Use This Image to STL Converter
This tool is built for anyone who wants to turn 2D images into 3D prints — from complete beginners to experienced makers.
3D Printing Hobbyists
Got a new 3D printer and want to make something personal? Upload a family photo, a drawing your kid made, or a favorite meme — turn it into a unique 3D print in minutes. No modeling skills required.
Makers & DIY Creators
Create custom cookie cutters from any silhouette. Make personalized signs, stamps, embossing tools, keychains, and decorative items. If you can draw it or photograph it, you can print it.
Designers & Artists
Rapidly prototype relief designs from your digital artwork. Convert logo concepts to physical mockups. Create lithophane art pieces from photography. Test ideas in hours instead of days.
Educators & Students
Create tactile teaching aids from maps, diagrams, and illustrations. Make learning accessible for visually impaired students. Bring geography, biology, and history to life with 3D printed models.
Small Business Owners
Create custom merchandise from your logo. Design unique product packaging molds. Make branded cookie cutters, stamps, and signage. All with zero software cost and no 3D modeling expertise needed.
Cosplay & Prop Makers
Convert reference images and texture maps into 3D models for armor pieces, prop details, and costume accessories. Use the heightmap editor to extract depth from concept art and game textures.
12 — Choosing a mode
Which conversion mode should I pick?
The fastest way to a good result is picking the right mode before you touch a slider. Here is how the three modes differ in practice, and how to tell within seconds which one your image needs.
Heightmap
Pixel brightness becomes physical height. One-sided relief, viewed from the front.
Pick it when your source is a photograph, portrait, or landscape with strong tonal range.
SVG Extrusion
Vector paths are extruded into solid geometry. Perfectly crisp edges, no pixelation.
Pick it when your source is a logo, icon, or typeface — anything with flat fills and closed paths.
Lithophane
Panel thickness varies to control light transmission. The image appears when backlit.
Pick it when the finished piece will sit in front of a light source — lamps, night lights, window panels.
- How do I know if my image is high-contrast enough for a good relief?
- Squint at it. If the main subject still reads clearly when half-closed, it will convert well. Relief depth is driven purely by tonal separation, so a portrait lit from one side produces far more depth than a flat, evenly lit snapshot. If the result looks shallow, raise contrast in a photo editor before uploading rather than pushing the height slider to its limit — extreme height on a low-contrast source just amplifies noise.
- My SVG has gradients and text effects. Will extrusion handle it?
- Extrusion works on geometry, not paint, so gradients, drop shadows, and raster filters are ignored entirely — only the underlying filled shapes are extruded. Convert text to outlines first, and flatten any effects before export. If the file still fails to extrude, the tool falls back to heightmap mode automatically, which rasterises the design and produces a usable model at the cost of crisp edges.
- What determines the physical size of the printed part?
- Only your slicer. The STL stores geometry with no unit system attached, so a model exported here has no inherent millimetres. Scale it in Cura, PrusaSlicer, or Bambu Studio to match your build plate. That also means the 512px processing resolution is not a size limit — a 512px relief scaled to 200 mm is simply coarser per millimetre than the same relief printed at 80 mm.
- Which is better for a lithophane: thicker or thinner?
- Thicker prints hold more contrast but block more light and take longer. Start around 3 mm maximum thickness with roughly a 0.8 mm floor, then print a small test tile before committing to a full-size panel. The floor thickness matters more than the maximum — drop it too low and the panel becomes fragile and prone to light bleed between adjacent areas.
- Why is my STL file unexpectedly huge?
- Triangle count is the cause, and triangle count is set by your smoothness setting. A 512px heightmap at maximum detail generates a dense mesh where a simplified one would look nearly identical once printed. Raise smoothness for geometric subjects and logos; keep it low only for fine photographic texture. Reducing triangle count also shortens slicing time noticeably.
- Can I edit the model after converting, without CAD software?
- Yes, within limits. The heightmap editor lets you crop, invert, and reshape the depth profile before export, which covers most corrective work. For anything structural — adding a base, hollowing, drilling a mounting hole — bring the STL into a free slicer or mesh tool. Because the output is a standard watertight mesh, it imports cleanly into Blender, MeshLab, or Tinkercad without repair.
Looking for something more specific — privacy, file limits, licensing, printer compatibility, or troubleshooting a preview that looks wrong? Those are answered in full on the FAQ page, and the step-by-step guide walks through a full conversion start to finish.
Start now
Ready to Turn Your Images into 3D Models?
Upload any image above and start converting. No registration, no software, no waiting. Get a print-ready STL file in under a minute — all from your browser.